
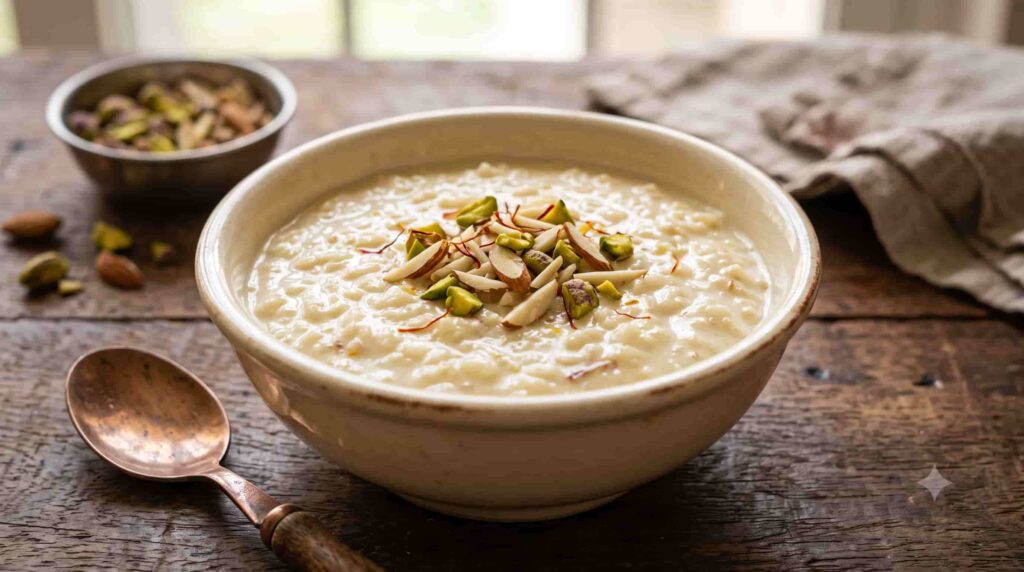
If there’s one dessert that shows up at almost every Indian celebration, it’s kheer. Diwali, Eid, birthdays, a random Sunday when you just want something sweet after dinner – this kheer recipe has been the go-to for generations, and for good reason. It’s rice slow-cooked in milk until it turns thick, creamy, and lightly sweet, finished off with cardamom and a handful of nuts.
I grew up watching my mother stir a pot of chawal ki kheer on the stove for what felt like forever, and I used to think it was some complicated dish. It’s not. Once you know the few things that actually matter – the right rice, the right milk, and a little patience – this Indian rice pudding basically makes itself. You just need to stand near the stove and stir it every now and then.
In this post, I’m sharing the exact method I use at home, along with the small mistakes I made when I was learning (so you don’t have to repeat them), a few variations, and answers to the questions people usually have about this rice pudding recipe.
What Is Kheer?
Table of Contents
Kheer is a traditional Indian milk-based pudding made by simmering rice (or sometimes vermicelli, sabudana, or lentils) in milk until it thickens, then sweetening it with sugar and flavouring it with cardamom, saffron, and nuts. The rice version – chawal ki kheer – is the most common one and is considered the “original” kheer in most Indian households.
It’s naturally gluten-free, fully vegetarian, and can be served warm or chilled depending on the season and your mood.
Why This Recipe Works
- No condensed milk needed – just milk, rice, and sugar, cooked the traditional way.
- One pot, minimal equipment – a heavy-bottomed kadhai or pan is all you need.
- Foolproof ratios – I’ve tested this with regular full-fat milk so the texture turns out creamy every single time, not watery or overly thick.
- Works for beginners – if you’ve never made kheer before, the step-by-step timing below will tell you exactly what to look for at each stage.
Ingredients for Rice Kheer
This recipe serves 4–5 people generously.
| Ingredient | Quantity |
| Full-fat milk | 1 litre (1000 ml) |
| Basmati rice (or any short-grain rice) | 3 tablespoons (about 40g) |
| Sugar | 5–6 tablespoons (adjust to taste) |
| Ghee | 1 teaspoon |
| Green cardamom powder | ½ teaspoon |
| Saffron strands (optional) | A small pinch |
| Cashews, chopped | 8–10 |
| Almonds, sliced | 8–10 |
| Raisins | 1 tablespoon |
A quick note on rice: Basmati gives a fragrant kheer with distinct grains, while short-grain rice (like the one used for khichdi) breaks down more and gives a thicker, mushier texture. Both are correct – it’s really a matter of preference. If you like your kheer more like a pudding with soft, dissolving grains, go with short-grain rice.
How to Make Rice Kheer (Step-by-Step)
Prep time: 15 minutes (plus 20 minutes soaking) Cook time: 40–45 minutes Total time: About 1 hour 15 minutes
Step 1: Wash and soak the rice
Rinse the rice 2–3 times until the water runs mostly clear. Soak it in water for 20 minutes, then drain completely. Soaking softens the grains so they cook faster and blend more smoothly into the milk later.
Step 2: Lightly roast the rice
Heat 1 teaspoon of ghee in a heavy-bottomed kadhai or pan. Add the drained rice and sauté on low flame for 2–3 minutes, just until it turns slightly translucent. This step isn’t compulsory, but it adds a subtle nutty flavour and helps the rice hold its shape a bit better while cooking.
Step 3: Add the milk
Pour in the milk and give it a good stir so the rice doesn’t stick to the bottom. Turn the heat to medium and let it come to a gentle boil.
Step 4: Simmer, low and slow
Once the milk starts boiling, lower the heat to its minimum setting. Let the kheer simmer gently, stirring every 4–5 minutes so the milk doesn’t catch at the bottom or form a thick layer of cream that doesn’t mix back in. This slow simmering is what actually builds the flavour and creaminess of kheer, so try not to rush this part.
Cook for about 30–35 minutes, or until the rice is fully soft and the milk has reduced to nearly half its original quantity and looks noticeably thicker.
Step 5: Add sugar and flavourings
Once the kheer has thickened, add the sugar and stir until it dissolves completely – this usually takes 3–4 minutes. Add the cardamom powder and saffron strands (if using) at this stage, not earlier, since sugar and acidic milk proteins can sometimes slow down the rice from softening if added too early.
Step 6: Add the nuts
Stir in the chopped cashews, almonds, and raisins. Let everything simmer together for another 2–3 minutes so the flavours combine.
Step 7: Rest before serving
Turn off the heat and let the kheer sit for 10 minutes. It will thicken further as it cools – this is completely normal, so don’t panic if it looks slightly thin right off the stove.
Serving Suggestions
Kheer tastes great both warm and chilled, so serve it however suits the occasion:
- Warm, garnished with a few extra strands of saffron and chopped pistachios – perfect for winter get-togethers.
- Chilled, straight from the fridge – ideal for summer festivals like Raksha Bandhan or after a heavy meal.
- In small matkas (clay pots) or steel bowls for a festive table setup.
- Alongside puri-sabzi or a festive thali as the sweet course.
Common Mistakes to Avoid
- Cooking on high flame – this is the number one reason kheer turns out grainy or has a burnt smell. Milk needs low, steady heat to thicken properly without scorching.
- Not stirring often enough – milk solids settle and stick to the bottom of the pan, giving the whole kheer a burnt undertone even if you don’t see visible burning.
- Adding sugar too early – it can be added early, but if you’re new to making kheer, it’s safer to add it after the rice is fully cooked, since sugar can slow down the softening process.
- Using a thin pan – a thin-bottomed vessel heats unevenly and increases the chances of the milk sticking. Always use a heavy-bottomed kadhai or a non-stick pan.
- Expecting it to be thick immediately off the stove – kheer continues to thicken as it cools. If you keep cooking it to your desired final consistency on the stove, it will turn overly thick and heavy once cooled.
Popular Variations of Kheer
Once you’re comfortable with the basic kheer recipe, it’s fun to experiment. Here are a few popular versions:
- Seviyan Kheer – made with roasted vermicelli instead of rice; cooks much faster.
- Makhana Kheer – uses roasted foxnuts (makhana), a lighter alternative often made during fasting.
- Sabudana Kheer – made with soaked tapioca pearls, another popular fasting-friendly option.
- Badam Kheer – ground almonds replace rice for a rich, nutty pudding.
- Gur ki Kheer – jaggery is used instead of sugar for a deeper, caramel-like sweetness.
- Instant Pot / Pressure Cooker Kheer – cook rice and milk together for 2 whistles, then simmer for another 10 minutes with sugar and nuts – a quicker method for busy days.
How to Store Rice Kheer
- Refrigerator: Kheer stays fresh for 3–4 days in an airtight container in the fridge.
- Reheating: It thickens a lot after chilling, so add a splash of warm milk while reheating on low flame to bring back the original consistency.
- Freezing: Not recommended – the texture of the rice and milk changes once thawed, and it tends to turn watery.
Frequently Asked Questions
Both work well. Basmati gives long, distinct grains and a fragrant kheer, while regular short-grain rice breaks down more and gives a thicker, more traditional texture. Avoid using rice varieties that stay very firm even after long cooking, like parboiled rice.
Yes. If you’re short on time, skip soaking and instead roast the rice in ghee for a few extra minutes before adding milk – this helps it cook a little faster, though soaking still gives the softest texture.
This usually happens if the milk is old or if something acidic (like a squeeze of fruit nearby) comes in contact with it while it’s hot. Always use fresh, full-fat milk and avoid adding fruits like banana or pineapple directly into hot kheer.
Simply let it simmer longer on low flame so more liquid evaporates. You can also mash a few cooked rice grains against the side of the pan and mix them back in for extra creaminess.
They’re similar in concept – both are rice cooked in milk and sweetened – but kheer is flavoured with Indian spices like cardamom and saffron and garnished with nuts, giving it a distinctly Indian character compared to Western-style rice pudding.
Yes, substitute the milk with full-fat coconut milk or a thick plant-based milk, and use a plant-based ghee substitute like coconut oil. The cooking time may reduce slightly since plant milks thicken faster than dairy milk.
Including soaking time, expect around 1 hour to 1 hour 15 minutes for the classic stovetop method. A pressure cooker version can cut this down to about 25–30 minutes.
A Few Final Tips
- Stir gently and often, especially during the last 10 minutes when the kheer is thickest and most likely to stick.
- Taste and adjust sugar right before turning off the heat – flavours are easiest to judge once the kheer has fully cooked.
- If you’re making this for a festival dessert recipe spread, prepare it a few hours ahead and chill it. Flavours actually deepen and taste even better after a few hours in the fridge.
- Toast the nuts lightly in ghee before adding them – it makes a noticeable difference to the aroma.
This creamy kheer recipe has been passed down and tweaked in kitchens across India for generations, and once you make it a couple of times, you won’t need to measure anything – you’ll just know when it looks and smells right. That’s really the whole secret to good kheer.

Meena Devi is a home cook and recipe creator who has been cooking and sharing traditional Indian recipes since 2005. With years of hands-on experience in the kitchen, she loves turning everyday ingredients into simple, flavorful dishes that anyone can make at home.
Her recipes are based on tried-and-tested cooking methods, family favorites, and the everyday food she has prepared over the years. Through Sawad India Ka, Meena shares practical recipes, helpful cooking tips, and the flavors she grew up with.