
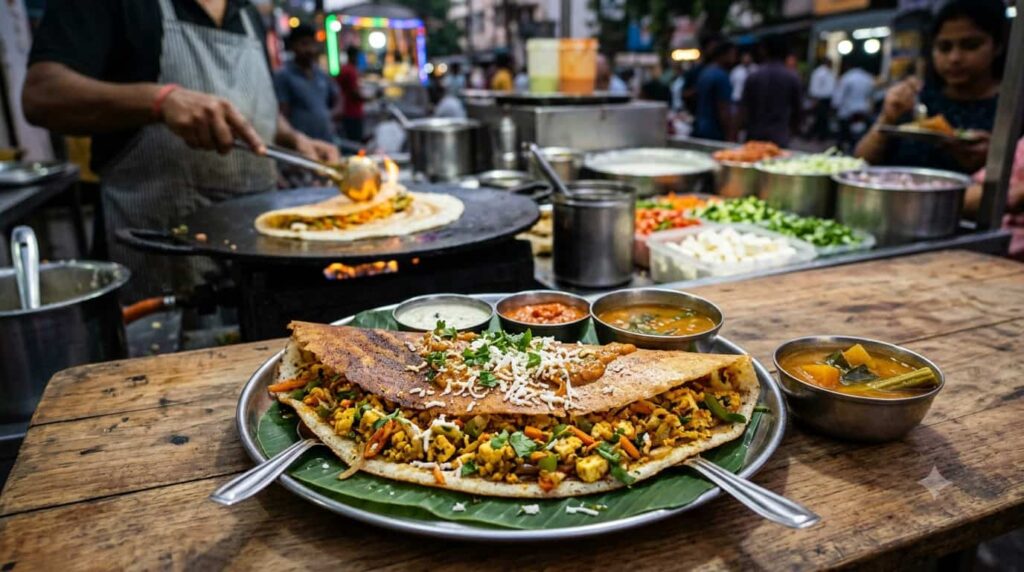
If you’ve ever stood at a busy dosa cart in the evening and watched the vendor stuff a sizzling dosa with a spicy, buttery paneer filling, you know exactly why paneer dosa has such a fan following. It’s crispy on the outside, soft and cheesy on the inside, and loaded with that unmistakable street-food punch of onions, capsicum, and masala.
The good news? You don’t need a street cart to enjoy this. This paneer dosa recipe brings that same street style paneer dosa flavour right into your kitchen, using simple ingredients and a method that even a first-time cook can follow without any confusion.
By the end of this post, you’ll know exactly how to make a paneer cheese dosa that’s crispy, golden, and packed with flavour -plus all the tips, common mistakes to avoid, and variations to try once you’ve nailed the basic recipe.
Why This Paneer Dosa Recipe Works
Table of Contents
There are dozens of paneer dosa recipes online, but most either skip the small details that actually matter (like batter consistency or tawa temperature) or make the filling too heavy and lose the “street” flavour. This recipe focuses on:
- A filling that’s spicy, tangy, and buttery -just like the roadside version
- Clear measurements so you don’t have to guess anything
- Practical troubleshooting for the two biggest problems people face: dosas that don’t turn crispy, and fillings that turn soggy
- Realistic prep and cook times, so you know exactly how long this will take
Whether you’re making this homemade paneer dosa for breakfast, a weekend brunch, or a quick dinner, this recipe is built to be foolproof.
What You’ll Need
For the Dosa (using ready batter)
You can use store-bought dosa batter to save time, or make it at home a day in advance. If you already have batter ready, jump straight to the filling section.
Quantity needed: About 3 cups of fermented dosa batter (makes 6-7 dosas)
If adjusting batter yourself:
- Add 2-3 tablespoons of water if the batter feels too thick (it should be pourable, like a thin pancake batter)
- Add ¼ teaspoon salt if the batter tastes bland (fermented batter often needs a top-up of salt)
For the Paneer Filling (Street Style)
| Ingredient | Quantity |
| Paneer (cottage cheese), crumbled or grated | 200 grams |
| Onion, finely chopped | 1 large |
| Capsicum, finely chopped | 1 medium |
| Tomato, finely chopped | 1 medium |
| Green chilli, finely chopped | 1-2, to taste |
| Ginger-garlic paste | 1 teaspoon |
| Butter | 1.5 tablespoons |
| Oil | 1 tablespoon |
| Turmeric powder | ¼ teaspoon |
| Red chilli powder | 1 teaspoon |
| Pav bhaji masala | 1 teaspoon |
| Garam masala | ½ teaspoon |
| Kasuri methi (dried fenugreek leaves), crushed | 1 teaspoon |
| Tomato ketchup | 1 tablespoon |
| Salt | To taste |
| Fresh coriander leaves, chopped | 2 tablespoons |
For Cooking and Assembly
- Butter or oil, for spreading and roasting the dosa (about 3-4 tablespoons total)
- Grated cheese (optional, for the “cheese dosa” version) – 4-5 tablespoons
- Chopped onion and coriander, for garnishing on the tawa
- Schezwan chutney or green chutney (optional, for that extra street-style kick)
Preparation and Cooking Time
- Prep time: 15 minutes
- Cooking time: 25 minutes
- Total time: 40 minutes
- Serves: 4 people (makes 6-7 dosas)
Step-by-Step Paneer Dosa Recipe
Step 1: Prepare the Paneer Filling First
Getting the filling ready before you start on the dosas makes the whole process smoother, since dosas need to be served hot off the tawa.
- Heat butter and oil together in a pan on medium flame. Using both gives the filling a rich taste without burning too quickly.
- Add the chopped onions and sauté until they turn light golden. This takes about 4-5 minutes -don’t rush this step, as raw onion flavour will spoil the filling.
- Add ginger-garlic paste and green chilli. Sauté for 30 seconds until the raw smell disappears.
- Add the capsicum and cook for 2 minutes on medium-high flame, keeping it slightly crunchy.
- Add chopped tomatoes, turmeric, red chilli powder, and salt. Cook until the tomatoes soften and the oil starts separating slightly, around 3-4 minutes.
- Lower the flame and add pav bhaji masala, garam masala, and kasuri methi. Mix well.
- Add the crumbled paneer and tomato ketchup. Toss gently so the paneer doesn’t break down too much -you want small chunks, not a mushy paste.
- Cook for 2-3 minutes, just until everything is heated through. Overcooking paneer makes it rubbery.
- Finish with chopped coriander leaves and turn off the heat. Taste and adjust salt or spice if needed.
Step 2: Get Your Tawa and Batter Ready
- If your batter has been in the fridge, bring it to room temperature before you start. Cold batter is one of the biggest reasons dosas don’t turn crispy.
- Check the consistency -it should be smooth and pourable, similar to buttermilk. Thin it with a little water if it’s too thick.
- Heat a flat cast-iron or non-stick tawa on medium-high flame. To test if it’s ready, sprinkle a few drops of water -if they sizzle and evaporate immediately, the tawa is at the right temperature.
- Lower the flame slightly, rub the tawa with a halved onion dipped in oil, or wipe with an oil-soaked cloth. This prevents sticking and gives an even surface.
Step 3: Spread and Cook the Dosa
- Pour a ladleful of batter in the centre of the tawa. Using the back of the ladle, spread it in outward circular motions, working from the centre to the edges, to form a thin, even circle.
- Drizzle a little butter or oil around the edges and on top of the dosa.
- Let it cook undisturbed on medium flame for 1.5-2 minutes, until the base turns golden and crisp, and the edges start lifting naturally on their own.
Step 4: Add the Filling and Fold
- Once the dosa is golden and crisp, spread 2-3 tablespoons of the paneer filling along the centre or along one half of the dosa.
- If you’re making the cheese dosa version, sprinkle grated cheese over the filling now, while the dosa is still on the tawa, so it melts slightly.
- Fold the dosa over the filling (like a half-moon or roll), or fold in both sides for a fuller street-style roll.
- Press gently with the flat side of the spatula and let it cook for another 20-30 seconds so the fold sets and the cheese melts.
Step 5: Serve Immediately
Slide the dosa onto a plate and serve hot, right away. Dosas lose their crispiness fast, so this isn’t a dish you want to prep ahead and reheat later -make it fresh and eat it fresh.
Serving Suggestions
- Pair your paneer dosa with coconut chutney and sambar for a South Indian-style meal
- For the true street-style experience, serve it with schezwan chutney or green mint-coriander chutney
- A side of filter coffee makes this a perfect weekend brunch
- Add a drizzle of tomato ketchup on the side, the way most street vendors do
Tips for the Crispiest Paneer Dosa
- Use well-fermented batter. If your batter hasn’t fermented properly, the dosa won’t turn crisp no matter how well you cook it.
- Don’t skip the resting time for batter. If you’re making batter at home, let it ferment for 8-10 hours, or overnight in a warm place.
- Medium flame is your friend. High flame burns the dosa before it cooks through; too low, and it turns chewy instead of crisp.
- Spread in one smooth motion. Going back and forth with the ladle tears the dosa or makes it uneven. One confident circular pass works best.
- Butter over oil for that street taste. Street vendors use generous butter, which is what gives their dosas that distinct aroma and golden colour.
- Keep the filling slightly dry. A watery filling makes the dosa soggy within minutes. Cook off any excess moisture from the tomatoes before adding the paneer.
- Fresh paneer works best. If using store-bought paneer that feels hard, soak it in warm water for 10-15 minutes before crumbling -it softens up and blends better into the filling.
Common Mistakes to Avoid
- Using cold batter straight from the fridge – it won’t spread evenly and browns poorly. Always bring it to room temperature first.
- Overcrowding the filling – too much filling makes folding difficult and the dosa breaks. Stick to 2-3 tablespoons per dosa.
- Not preheating the tawa properly – a tawa that isn’t hot enough leads to pale, soft dosas instead of crisp, golden ones.
- Adding cheese before the filling has cooled slightly – if the filling is too hot, cheese melts unevenly and turns oily instead of stretchy.
- Skipping the batter consistency check – batter that’s too thick makes thick, chewy dosas instead of the classic paper-thin, crispy texture.
Variations to Try
- Paneer Masala Dosa: Combine the classic potato masala with the paneer filling for a heartier, fusion version. This is one of the most popular twists people search for alongside paneer masala dosa.
- Paneer Chilli Dosa: Add a touch of soy sauce, vinegar, and extra capsicum to the filling for an Indo-Chinese street-style flavour.
- Cheese Burst Paneer Dosa: Load extra mozzarella or processed cheese inside the fold for a gooey, cheese-pull effect.
- Jain-Style Paneer Dosa: Skip the onion and garlic, and use grated cabbage and capsicum instead for bulk and crunch.
- Paneer Tikka Dosa: Marinate the paneer cubes in tikka masala and yogurt before pan-frying, then crumble and use as filling for a smoky, tandoori twist.
Storage Instructions
Dosas are best enjoyed fresh and hot, but here’s how to handle leftovers if you have them:
- Batter: Store in an airtight container in the fridge for up to 3 days. Bring to room temperature before using.
- Paneer filling: Cool completely and store in an airtight container in the fridge for up to 2 days. Reheat on a pan before using, adding a splash of water if it feels dry.
- Cooked dosa: Not recommended for storing, as it loses its crispiness quickly. If you must, wrap in foil and refrigerate for a few hours, then reheat directly on a hot tawa (not in a microwave) to bring back some crispness.
Frequently Asked Questions
Yes, you can use instant rava dosa batter or a quick semolina-rice batter if you’re short on time. The dosa will still taste good, though traditionally fermented batter gives a slightly tangier flavour and better crispiness.
Masala dosa is stuffed with a spiced potato filling, while paneer dosa uses a paneer and vegetable filling instead. Some versions, called paneer masala dosa, combine both fillings together.
Absolutely, and it’s actually recommended. Homemade paneer is softer and creamier, and it holds up better in the filling without turning rubbery.
This usually happens when tomatoes aren’t cooked down enough before adding the paneer, or when too much ketchup is added. Cook the tomato-onion base until the oil separates before adding paneer.
It’s a good source of protein from the paneer, along with fibre and probiotics from the fermented batter. To make it lighter, use less butter and add more vegetables to the filling.
It’s not ideal, since paneer’s texture changes after freezing and thawing. It’s best made fresh or stored in the fridge for a day or two.
If you don’t have pav bhaji masala, use a mix of chaat masala and garam masala in equal parts as a substitute. The flavour will be slightly different but still tasty.
Final Thoughts
This crispy paneer dosa recipe is one of those dishes that looks impressive but is genuinely simple once you understand the two key parts – a well-made filling and a properly cooked dosa. Get those right, and you’ll have a restaurant-style, street style paneer dosa ready in your own kitchen, without needing to step outside.
Try it this weekend, and don’t be surprised if it becomes a regular request at your breakfast table.

Meena Devi is a home cook and recipe creator who has been cooking and sharing traditional Indian recipes since 2005. With years of hands-on experience in the kitchen, she loves turning everyday ingredients into simple, flavorful dishes that anyone can make at home.
Her recipes are based on tried-and-tested cooking methods, family favorites, and the everyday food she has prepared over the years. Through Sawad India Ka, Meena shares practical recipes, helpful cooking tips, and the flavors she grew up with.